

If you have updated your system to Windows 10, you probably would have associated your computer to a Microsoft Account. This has it’s own benefits, like all your browsing history, One Drive files and Windows Store data are synced across all Windows 10 devices. Moreover, you get a real benefit of the ability to change your computer’s password even when you are away.
But, the downside is, there comes a question on your privacy. That’s not the only concern, I mostly use complex passwords for emails, which ultimately drives me crazy every time I sign-in on my Windows 10 computer, moreover, if I have to share my computer with my friend, I have to share my password too, which ultimately reveals my email password. (I can opt for PIN or Picture Password, but still….)
So, here’s a quick walk-through to revert back to local sign-in,
Step 1
Click on the “Start Menu” and click “Settings”
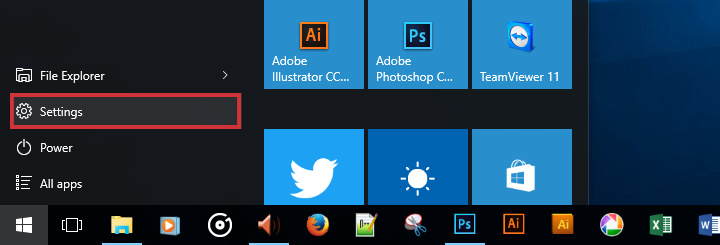
Step 2
In the “Settings” windows, click on “Accounts”
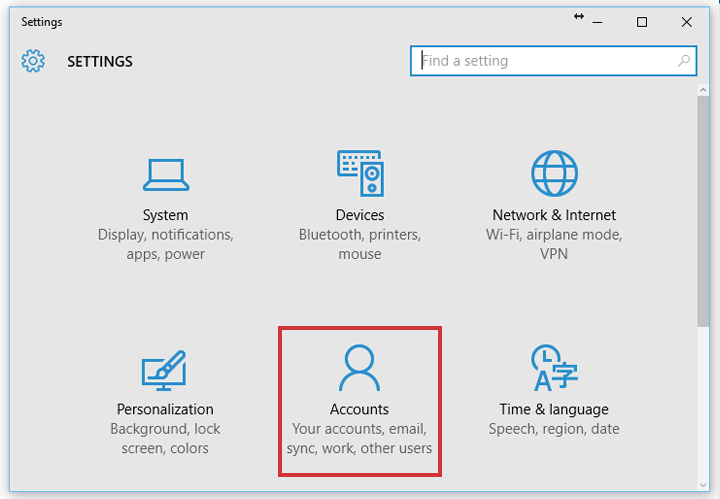
Step 3
Now in the “Account Settings” Window, click “Sign in with a local account instead“, under the “Your Email and Accounts” tab

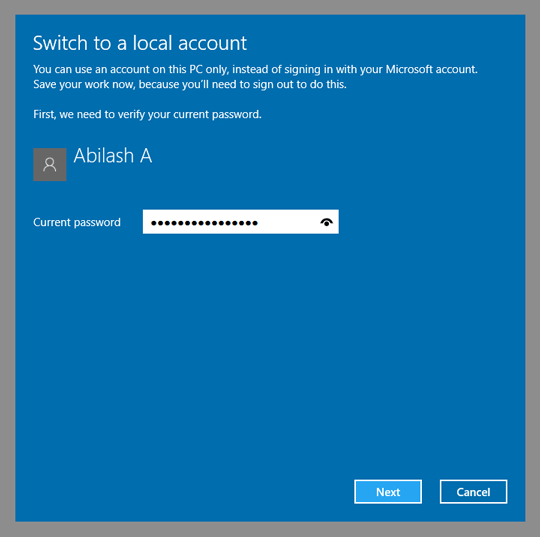
Step 4
Enter your current password, which is your Microsoft account password
Step 5
Set new password for your local account

Step 6
Now, make sure to save and close all your applications, and click “Sign out and Finish”

Step 7
Done, the system will sign you out and now you can sign in to your local account with the new password


